Faux Fried Pickles

Today is a very special post – because I am dedicating it to one of the most amazing women I know – my Biffer!

(For those of you who don’t know, that’s what my sister Lindley and I call each other.)

Why today? Because it’s her birthday!!!! Last night she kept texting me her age – I’m hoping it was because it was the last day she could say the younger year opposed to having to remind herself. Hey, senility is a serious problem for the elderly!

All kidding aside (for now), I truly value my relationship with my sister – I have always looked up to her. I still do today, and likely, I always will. Her relationship with the Lord is truly inspirational, and it shines through her in her daily life. Her marriage (to my rockin’ brother-in-law) of almost 13 years is a wonderful example for my husband and I. And she’s an amazing mother to my 4 adorably silly nephews. Yes, that’s 4 boys. And a husband. And a dog. And well, putting up with me sometimes. Let’s get this woman a cape already!

Biffers

Somebody as special as my Biffer deserves a treat, right? We love having Biffer nights out…and they usually involve some yummy food, beverages and a fun activity. I remember visiting her at IU – we had planned a Biffer craft night where we made lots of fun stuff and watched Moulin Rouge. But before such an intense evening, we needed some fuel. So we went to a local restaurant/bar simply because of an offering on their menu – fried dill pickles.

Now, some may turn up their nose at the sound of fried dill pickles. Especially if you are a semi-rational person freak and don’t like pickles. But they have been a favorite of ours since our childhood when we’d take road trips down to Gulfport, Mississippi to visit my grandparents and eat at the Catfish Shack (sounds pretty classy right?). We actually consider ourselves connoisseurs of the fried pickle – like if a place offers the fried pickle spears, psh, no thank you! It must be the chips!

Close Up Pickles

Whether it was me picking up a to-go order of fried pickles for her during her first pregnancy, or us shoving down an order before going to see Top Gun (she loves Tommy C.) at the Orpheum, fried dill pickles will always make me think of my Biffer.

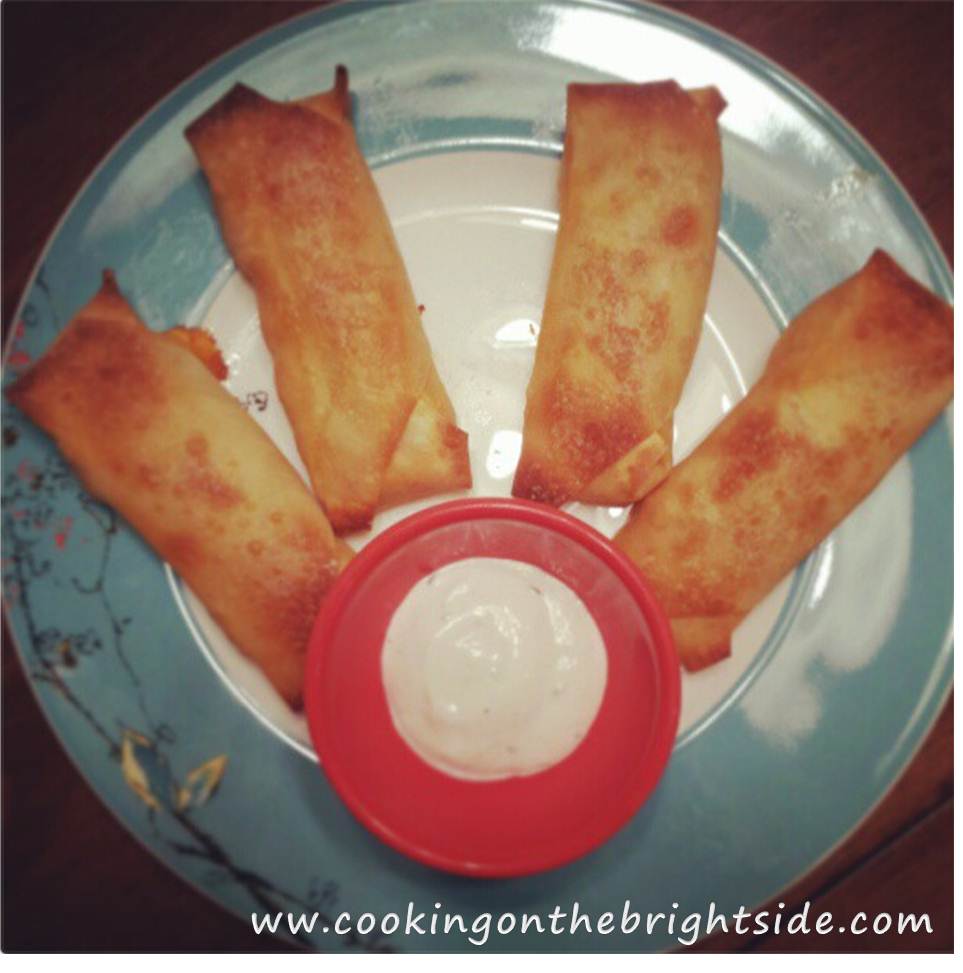
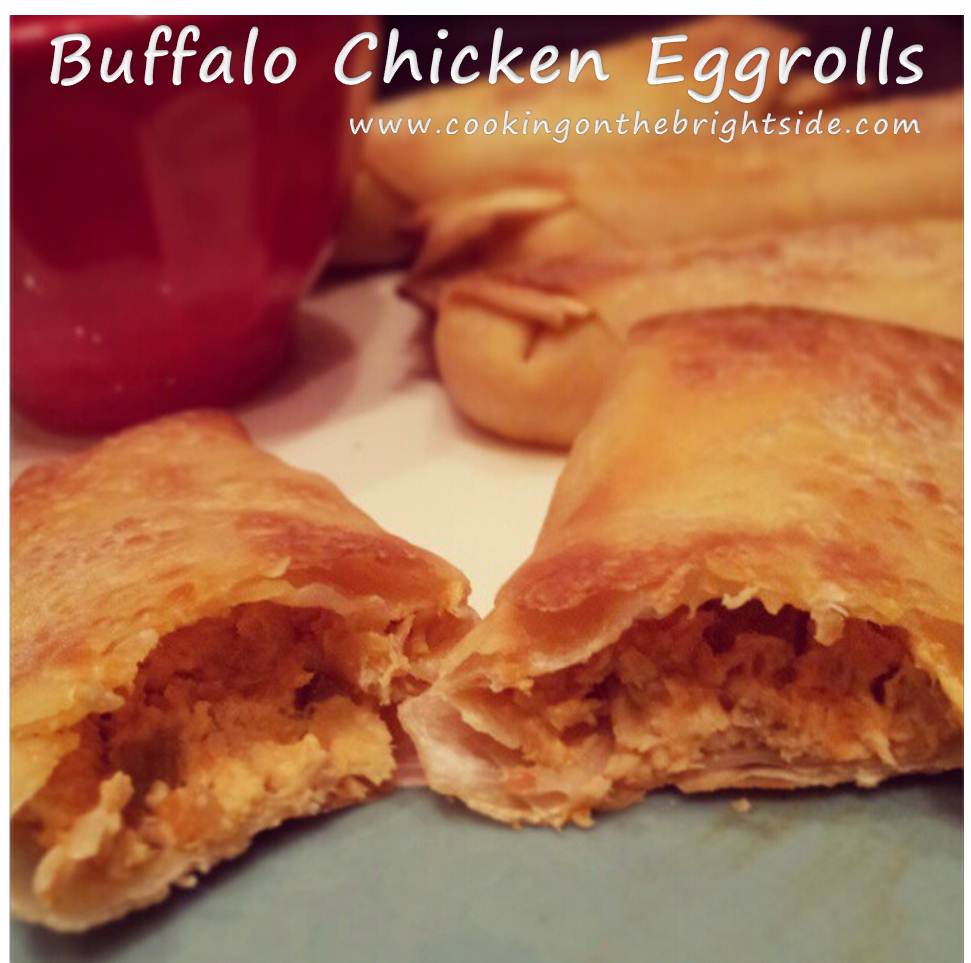
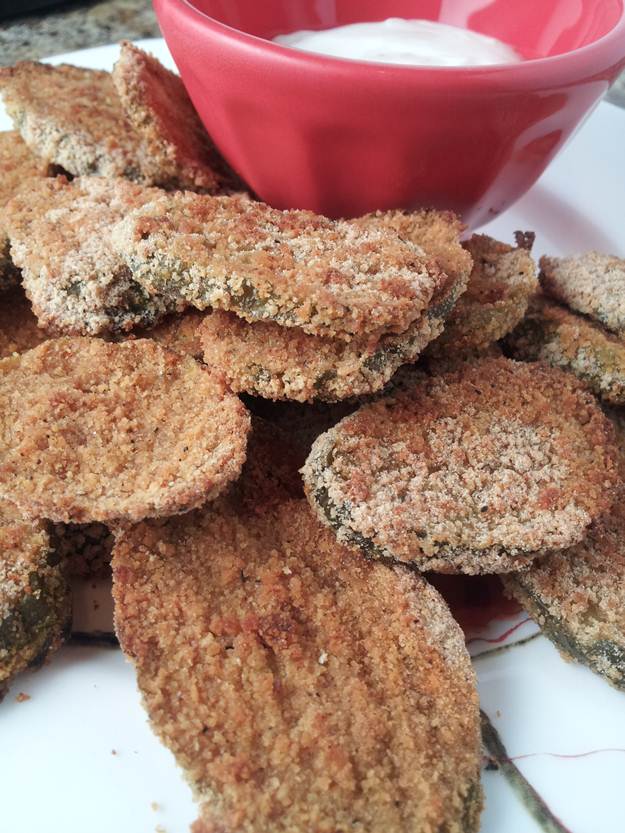
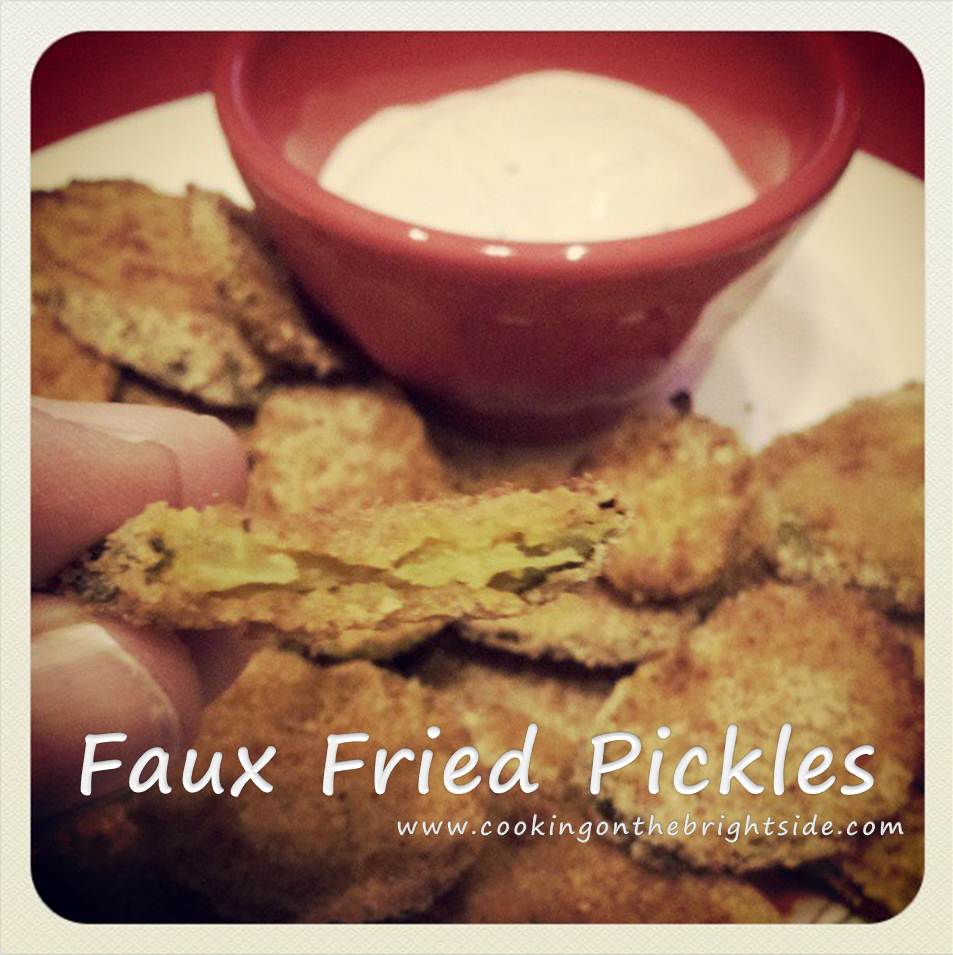
So today, in honor of my Biffer turning 30 + some, I am sharing a recipe for Faux Fried Pickles – a healthier way to enjoy our obsession!

Faux Fried Pickles (Serves 2-4 / 8 WW points total)

Ingredients

Half a 16 oz. jar thick cut, oval dill pickle chips (I used about 24 slices)

1 egg, beaten

1/2 Tbsp. Worcestershire sauce

1/2 tsp. Tabasco

1/3 cup whole wheat bread crumbs

1 Tbsp. white whole wheat flour

1/4 tsp. garlic salt

1/8 tsp. black pepper

1/4 tsp. smoked paprika

1/4 tsp. Cajun seasoning

1/3 cup fat-free Ranch dressing

Heat oven to 450 degrees. Spray a medium baking sheet with non-stick spray.

Lay your pickles on some paper towels and blot to dry.

Dry

In a small bowl, whisk together egg, Worcestershire and Tabasco. In a medium dish, mix together breadcrumbs, flour and seasonings. Working in batches, add pickles to the egg mixture to coat. Let any excess drip off, and then add to the crumb mixture. Press pickles into the mixture to ensure a good coating, then add to greased baking sheet. Repeat until all pickles are good and coated. Bake 10-12 minutes, then flip and cook another 5-7 minutes until golden brown.

PickleCollage

Serve hot with some ranch dressing for dipping.

Plated

Hope y’all enjoy…

Faux Fried Pickles

And Happy Birthday Biffer!

Buffalo Chicken Egg Rolls

I am so incredibly excited for this weekend! Not only is it a “we don’t have 15,000 things to get done” type weekend, but tomorrow is supposed to be gorgeous! As much as I do love winter and cold weather precipitation, it’s March people. I need some sunshine.

I’m ready for pretty pastel colors and beautiful flowers! I need to break out the grill and make cold, refreshing fruity beverages!

I need some patio weather…and a tan.

The husband and I absolutely love our backyard, although I confess I do not always have a sunny disposition when it comes to yard work. Okay, I hate it. There, I said it!

But – I do love to entertain, so that kind of makes up for it right? He gets the yard looking nice, I whip up lots of goodies and everybody enjoys themselves. It’s a win-win people (any comments affirming that statement would be appreciated so that I can print and laminate and post on the refrigerator).

So in the spirit of entertaining, I’m sharing a delicious new recipe with y’all I whipped up a few weeks ago and had to make again so that I could get pictures for sharing. I tried a version of these out at lunch with my co-workers a few weeks ago and though, I could easily make a healthier version of these!

With Dip

And voila, I did. It should come as no surprise to you that it’s a buffalo chicken recipe…I’m pretty transparent huh?

Baked Buffalo Chicken Egg rolls  (Makes 8 egg rolls / 3 WW points per egg roll)

Ingredients

1 1/4 cup cooked chicken breast, shredded

1-2 oz. fat free cream cheese, softened

1/3 cup celery, chopped fine

1/2 cup reduced-fat blue cheese crumbles

1/3 cup Frank’s red hot sauce (this is a good medium heat and good consistency)

8 egg roll wrappers

I Can’t Believe It’s Not Butter spray

1/2 cup fat free Ranch dressing

Heat your oven to 350 and coat a baking sheet with non-stick spray.

In a small bowl, mix together shredded chicken and cream cheese. Start with 1oz. cream cheese and see how it blends – shouldn’t be overly mushy, just enough to kind of hold the chicken together. Then add your hot sauce, celery and blue cheese crumbles and mix together until combined.

Cream CheeseHot Sauce

Blue Cheese

That was easy enough, right?

Now for the semi-tricky part – making the egg rolls look pretty decent. Make sure you have a clean, dry work surface and a small bowl of water and a pastry brush. Here are my step-by-step instructions…and some entertainment because I can’t be the only one who has it in my head while giving 5-step instructions. You know you love me.

Step 1: Take corner closet to you and fold up to filling. Brush top with a little water.

Step 2: Take side corners and fold inward on top of bottom fold.

Step 3: Firmly roll the wrapper up toward the top corner.

Step 4: Brush wrapper with water where the top corner is about to meet and press down.

Step 5: Place on baking sheet, spray with butter and repeat until done!

Eggroll Steps

It really is easier once you get the hang of it…and if they don’t turn out beautiful, at least they are still delicious right?

Once you have all of your egg rolls, um, rolled, bake for 6 minutes. Remove from oven, flip, spray other sides with butter spray, and return to oven for another 6-7 minutes. Plate and serve with Ranch dressing.

Plated

These are super delicious and actually pretty filling – the husband and I had these for dinner one night and 4 seemed to be the perfect amount! I’m sure you could cut these in half and serve as appetizers…but let’s be honest, you need a whole one to yourself!

Buffalo Chicken Egg Rolls

Enjoy and have a wonderful weekend everybody!

Caribbean-Style Crab Cakes

Well, if you haven’t realized it already – tomorrow is Valentine’s Day! (And seriously, if you haven’t – it basically means you never leave your house, turn on your radio, tv or computer – so those of you who I am addressing aren’t even reading this)

Now, I have always enjoyed Valentine’s Day – yes, even when I was single. I loved getting together with my girlfriends and eating ice cream, drinking wine and hanging out. Yes, even when 3 of us went to dinner at a nice restaurant and the server kept asking us if anybody else was joining us…

Well, now that I’m a married woman – the day holds a little more significance. I know it’s a “Hallmark” holiday, but what’s wrong with a day dedicated to love?

I still don’t understand going to a favorite restaurant to be served from a limited menu at double the cost, but that could just be because I tend to be a homebody sometimes. As I’ve said before, nothing beats enjoying a nice fancy meal consumed in the comfort of clothing that involves an elastic waistband.

So if you’re thinking like me (terrifying, I know) and want a special meal in – look no further friends. I bring you a recipe for Caribbean-style crab cakes. You could half the recipe and pair a crab cake with a small steak, or just make the whole batch paired with some roasted parmesan asparagus.

I usually prepare this recipe as an appetizer that makes about 16 servings, but it is just as delicious made just for 2. Now a few of the variations here were to make this recipe Weight Watchers friendly – like Fiber One crumbs – so the mixture is a little more “wet” than most crab cakes.

Caribbean-Style Crab Cakes (Serves 2 for meal / 8 WW points per serving; Makes 16 mini cakes for appetizer / 1 WW point each)

Ingredients

8 oz. crab meat (I go for the “specialty” kind – smaller pieces make it easier)

1/4 cup red bell pepper, diced

1/4 cup green onion, diced

1 Tbsp. Caribbean jerk seasoning

1 tsp. dried parsley

3/4 cup ground Fiber One bran cereal

1 Tbsp. honey

1/4 cup egg beaters

1/2 cup fat-free mayonnaise

1 Tbsp. margarine

Cayenne pepper for garnish

2 Tbsp. apricot jam

1 Tbsp. fresh lime juice

Begin by chopping the bell pepper and onion. Add to bowl with crab meat, Caribbean seasoning, parsley and cereal crumbs.

Dry Ingredients

Then add in mayonnaise, honey and egg. Mix together until all ingredients are incorporated. Form into 4 large patties – I had some leftover to prevent the patties from being too massive. (You can also form into 16 small patties for appetizers – start with a scoop the size of a ping-pong ball and work it into a patty.) Refrigerate until ready to cook.

Wet ingredients

Heat 1 Tbsp. margarine over medium in a large skillet. When margarine is hot, add crab cakes. Cook 5-7 minutes on medium-low and then flip, cooking an additional 5-7 minutes.

CakesCooked

While cakes are cooking, whisk together apricot and lime.

Apricot Lime

Add crab cakes to plate and sprinkle with a small amount of cayenne pepper.

Plated

Then top with a dollop of apricot-lime sauce…

Cake with Sauce

and devour with a glass of crisp white wine.

Close Up

Have a happy Valentine’s Day everybody!

A Week of Celebration

Do you know what tomorrow is? I mean, other than the day that adorable little Phil will tell us when Spring is set to arrive.

Tomorrow is my blog’s birthday! Or is it anniversary?

Let’s go with birthday since that’s the theme of the week. On Monday I said farewell to my 20’s – so today, as a way of celebrating this lovely occasion, my blog will say farewell to something too. Have you figured out the surprise? Check the top of your computer screen:

www.cookingonthebrightside.com

My blog has its’ own domain name now! Very nerdy of me to be excited about, I know, but hey – if you’ve been with me for a year, you expect it by now, right?

Have no fear – any older links will still take you to your favorite recipe. Now it’s just abbreviated, which means it’s easier to remember for when you’re passing it along to your friends. (Wink wink).

In addition to tomorrow being a very special day for my blog – Sunday is a very special day  for football lovers (like myself) and for food lovers (um, duh) and for those of us who just enjoy fun celebratory occasions in general.

So if you’re hosting a party for 50 on Sunday or just getting together with a small group and maybe tuning in to the Puppy Bowl – here’s a little recipe roundup for your menu planning!

Pre Game

AppCollage

Buffalo Chicken Potato Skins

Buffalo Chicken Meatballs

Buffa-faux Chicken Tenders

Mexican Dip

Skinny Faux-Fried Mozzarella Sticks

The Main Event

Main Course Collage

Buffalo Chicken Soft Tacos

Buffalo Chicken Soup

BBQ Chicken Stromboli

Cheeseburger Soup

Pizza Soup

Spicy Pulled Beef

Turkey Beer Chili

Of course, you can always jazz your party up with a fun theme. I’m talking about New Orleans. So serve up some festively Cajun recipes and throw back a Louisiana-brewed beer  (might I recommend Abita? Light and Amber are delicious!) and you’ll feel like you’re celebrating in the Big Easy!

Lagniappe (translation: a little something extra)

CajunCollage

“Fried Shrimp” with Spicy Sauce (or make some po boys cut up into sliders!)

Cajun Shrimp Casserole

Creole Stew

I hope everybody has a wonderful weekend celebrating – as they say in N’awlins…

“Laissez les bons temps rouler!”

Wasabi Shrimp Bites

I don’t know about y’all, but I’m starting to feel the pressure!

I absolutely love this time of year but it can really be stressful – I just feel like there isn’t enough time to get everything done. Figuring out schedules, bringing food to parties, organizing lists, planning parties, baking, getting gifts ordered, wrapping gifts…oh, and trying not to gain 10 pounds if you can help it!

Well, I can’t take care of your Aunt Mildred’s gift or tell you what to do with that door prize you won at the office, but I can at least arm you with a delicious dish to take to your parties that you can snack on without any guilt! (Okay, well, maybe a little guilt since you might show up the store-bought deli tray and the shady looking jello mold…)

I actually found these on the Weight Watchers website over a year ago and they are now a family favorite. I’ve modified them slightly to make them even easier to prepare, but they are seriously delicious and easy to make – and nobody can even tell they are “diet-friendly.”

Wasabi Shrimp Bites (Makes 24 pieces / 2 pieces = 1 WW point)

Ingredients

24 small-medium cooked shrimp (1/2 pound should work)

1 cucumber

1 avocado

1/4 cup fat-free mayonnaise

1 tsp. Wasabi paste

1 tsp. soy sauce

Begin by mixing together your mayonnaise, soy sauce and wasabi paste. Adjust according to taste – I usually add a little more wasabi for more of a kick. Refrigerate until ready to use.

Soy

Rinse shrimp and remove tails.

Slice your cucumber into 24 slices and cut avocado into 24 small pieces.

CucumberAvocado

To assemble, spread about 1/2 tsp. wasabi-mayo mixture on each cucumber slice. Add a piece of avocado and top with 1 shrimp.

Top

Refrigerate until ready to serve, and then dig in…

Instagram

Hope you all have a great weekend!

Cranberry Brie Tartlets

So if I had a magic lamp and a blue genie with the voice of Robin Williams popped out, it might be incredibly difficult to come up with just 3 wishes. And you know the rules people – you can’t wish for more wishes!

Can you tell Aladdin was on last night?

Anyways, I think last week if I could have been granted any wish – it would probably have been to make the saying that “Holiday calories don’t count” true. I mean, two Thanksgivings in one day. Wine. Leftovers. And you know, pie. And leftover pie.

Oh, and it was my Mom’s birthday on Sunday – so the husband and I had my parents over for a special birthday dinner. Which of course involved more food. And dessert.

And now, we are about to enter December – which means endless holiday parties filled with delicious (and likely calorie-laden) foods. Lucky for you, I have a super easy and delicious recipe that will be a huge hit at your parties. The best part (other than it includes my favorite – Brie) is that it’s guilt free!

Cranberry Brie Tartlets (Makes 15 pieces/1 WW pt. per piece)

1 package mini fillo shells (15 shells per box)

1/4 cup whole berry cranberry sauce

1 tsp. orange zest

2 3/4 oz. light Brie

Mix together cranberry sauce and orange zest. Refrigerate for at least 30 minutes to allow flavors to blend.

Preheat oven to 350. Place shells to baking sheet and bake for 5 minutes.

While shells are baking, remove rind from brie and divide into 15 pieces.

Reduce heat to 300 and add one piece of brie to each shell. Top with a dollop of cranberry mixture and return to oven for 6-7 minutes until cheese has melted.

Beware…these disappear very quickly!

Buffalo Chicken Potato Skins

I have a serious issue.

I mean beyond my fear of balloons (also known as “globophobia” – which means I am not alone!). And okay, I’m also overlooking the rage incited within me when somebody confuses the words “flavor” and “scent.” Yeah, let that one marinate for a minute..it’s maddening!

The issue I’m talking about is my love for all things buffalo-flavored.

You’d think I would have fun out of buffalo inspired recipes by now. You, my dear friend, would be wrong.

I also have an obsession with potato skins. I love potatoes in pretty much every form – but roasted until crispy and topped with cheese and bacon? Right, no words needed.

Clearly, not exactly the healthiest of choices – but in my defense, I usually order this “appetizer” as a main meal. I’ll be debating my selection and the husband will look up from his menu and be like “You’re ordering potato skins aren’t you?” Yes, over that delicious famous local burger or yummy spicy hot wings. Over hot wings people – that speaks volumes, does it not?

Well, I have finally found a way to combine my two loves – and the best part is that this recipe is healthy for either a main meal or a snack! It’s the perfect thing to enjoy while watching college football this weekend – or to snack on next week when you’re burnt out on turkey!

Buffalo Chicken Potato Skins (2 WW pts. per skin with 1/2 Tbsp. Ranch dressing)

6 small russet potatoes

8 oz. raw chicken breast

1/4 cup chopped celery

1/3 cup Frank’s Red Hot sauce

6 Tbsp. reduced-fat blue cheese crumbles

1/2 cup shredded fat-free mozzarella

1 Tbsp. Hidden Valley Ranch Mix

6 Tbsp. fat-free Ranch dressing

Salt and pepper

Olive oil spray

Preheat your oven to 450.

Slice all of your potatoes in half. This will give you 12 halves. See? Math is fun!

Now scoop out the insides of your potatoes, leaving about 1/4 inch border to hold your filling and well, allow you to taste the potato. I used a melon baller to scoop since the potatoes are still raw.

Spray both sides of your potatoes with olive oil. Sprinkle both sides with salt and pepper. I sprinkled a little Ranch seasoning on the inside to give it a little extra boost of flavor – yum! Place skins on a lightly greased baking sheet and bake for 15-20 minutes until the potato flesh is tender and the skins are slightly crispy.

While the potatoes are cooking, bring a pot of water to a boil and add your chicken. When chicken is cooked (8-10 minutes is good) let chicken cool slightly and shred with 2 forks. Add about 2-3 Tbsp. hot sauce and mix well.

When your potato skins are cooked, remove from the oven and begin to assemble!

Add your shredded chicken and celery. Then add about 1/2 Tbsp. each of blue cheese crumbles and shredded mozzarella.

Return to oven for 5-7 minutes until cheese has melted.

Remove and drizzle remaining 2-3 Tbsp. hot sauce on potato skins. I also sprinkled with some dried chives due to lack of green onion, but that’s up to you!

Serve with some fat-free Ranch dressing for dipping and devour!

Try them while you’re rooting on your team this weekend…you won’t regret it!

Hearts of Palm Dip

This week is a very exciting week – because my friend Erin is getting married on Saturday!

So, I’d like to dedicate a special blog to my Punk for her wedding week!

Now, Erin and I go way back. Actually, our dads introduced us! It was move in day at Penn State in 2001 and I was a shy little freshman. So awkward introduction, special circumstances (roommates be crazy!) and social interaction (Captain Morgan in particular) broke the barrier of awkwardness, and we became “Punks” – which I honestly don’t even know the origin of other than me randomly calling her that one day in jest as we were crossing paths in the bathroom of Bigler Hall.

Through trips to St. Lucia, St. Martin, Destin, Memphis, Pittsburgh and lots of football and lake house weekends together, we have remained close friends and I am so thankful for that. She is one of the kindest, most genuine people that I know – and it doesn’t hurt that we have a ton in common, such as loving dirty martinis, all things artichoke-olives, Penn State football, the Pittsburgh Steelers (she’s the one who converted me!), glasses of wine, beaches, good books, and great conversations. I was honored to have her by my side on my wedding day and I am so excited to be able to do the same for her!

I am so happy for her and Jason and what they have to look forward to as Mr. & Mrs. and I know she is going to be an absolutely stunning bride on Saturday!

Well, last month we had Erin’s bachelorette weekend in Destin, Florida and I thought it would be fun to do a little shower portion and use the “50 Shades of Grey” trilogy as a theme because she loved the books. Don’t be scared – nothing too over-the-top, but I did have fun coming up with foods and decor for the shower! If you haven’t read the books – you probably won’t get some of the references, BUT I promise you it was all delicious and lasted us for two meals and some snacks!

Hearts of Palm Dip (aka “Twitchy Palms Dip” – serves 8-10)

FYI – I was not at my own grocery store so I couldn’t find a lot of the fat-free loot – but if you use reduced-fat Parmesan and fat-free mozzarella, mayo and sour cream, the total WW Points for this dip (minus and chips, crackers, etc.) is 16.

1 14.5 oz. jar hearts of palm, drained

1 cup shredded mozzarella cheese

1/2 cup Parmesan cheese, grated

1 cup chopped green onion

1/4 cup sour cream

3/4 cup mayonnaise

Salt and pepper to taste

In a medium bowl, add your mayonnaise, sour cream, mozzarella and Parmesan.

Chop up hearts of palm into bite-sized pieces. Add to bowl with green onion, salt and pepper.

Mix well and add to a medium baking dish. Bake at 350 for 20-25 minutes until lightly browned and bubbly.

Serve with crackers or pita chips!

I decorated the table with a sparkly piece of fabric and used some mini handcuffs to lay on the table and hang from the chandelier, along with a “Laters, Baby” sign and a silver masquerade mask.

Accompanying the “Twitchy Palms Dip” were  “BL-Teasers”, “Inner Goddess Sandwiches”,  “Bow Tied-Up Pasta Salad” (I just used bow tie pasta for my buffalo chicken pasta salad), “Mr. Mercurial Crabby Bites” and “We Aim to Cheese-y Olive Bread.” I also whipped up some semi-homemade ice cream sandwiches where I made cookies using ground up Twinings English Breakfast Tea (a favorite of the main character) and vanilla Haagen Daas ice cream.

To wash it all down, we had a delicious specialty cocktail that we sipped on while the bride-to-be opened her shower gifts!

I’ll be sure to share that on Friday so we can all toast to the bride and groom – cheers y’all!

Skinny Faux-Fried Mozzarella Sticks

I’m not sure if I was more excited for a 3-day weekend or happier that this “short” week is almost over!

So as I said, I love college football and have always been a huge fan. Last Friday night was like my Christmas Eve – making Saturday my Christmas Day!

I wake up early and dance around singing “It’s College Gaaaame Day!”  – which I used to do to wake up my friends when we’d spend Labor Day weekend together. So this year, I just sent them all a voice recording so they didn’t miss out. It was nice getting to annoy them without getting their glares of death.

Well, after watching my team’s game early Saturday at the bar and eating some not so healthy football food, I decided that football food needed a healthy twist on Saturday night.

Enter Skinny Faux-Fried Mozzarella Sticks. Who (besides my crazy sister) doesn’t love delicious, melty, fried cheesy goodness dipped in marinara sauce?

That’s what I thought.

Skinny Faux-Fried Mozzarella Sticks  (1 WW point per piece)

6 pieces Weight Watchers String Cheese

2 Tbsp. Egg Beaters

1 Tbsp. white whole wheat flour

2 1/2 Tbsp. Panko bread crumbs

2 1/2 Tbsp. Italian-style bread crumbs

1 tsp. reduced-fat grated Parmesan cheese

1/2 Tbsp. dried parsley

1/4 tsp. garlic salt

1/2 cup marinara sauce (I used Newman’s Own)

Cut cheese sticks in half.

In a medium bowl, mix together  bread crumbs, Parmesan, parsley and garlic salt.

Set up your assembly line. First, a small bowl with flour. Next, another small bowl with the egg. Then the bread crumb mixture. Lastly, a small pan or dish lined with wax paper.

Roll cheese in flour, coating lightly. Then dip in egg, letting any excess drip off.

Then press cheese into crumb mixture, coating well. Then place on wax paper.

Repeat until all cheese is coated. Place coated cheese sticks in the freezer for at least 30 minutes – otherwise, you’ll end up with a melty mess! I also think this step make this recipe awesome for company because you can do all of the “work” ahead of time!

Preheat your oven to 400 degrees.

When you are ready to bake, move your mozzarella sticks to baking sheet lined with lightly greased foil. Spray tops lightly with olive oil and bake for 5 minutes.

Remove from oven and roll mozzarella sticks and bake another 5 minutes.

Heat your marinara sauce in the microwave until warm.

Serve mozzarella sticks warm with marinara sauce for dipping.

Mmmm, I might have to make these again very soon…

Happy Friday everybody – have a great weekend!

Chipotle Chicken Croquettes

Okay, I am officially running around like a crazy person this week getting ready for one of my best friend’s bachelorette parties this weekend! I’m so excited to get a weekend with my girls – and I’m sure I’ll have some fun things to share with y’all when I return!

So when I find myself super stressed out, for some reason, I turn to the kitchen. I recall one time in college I gave up sweets and caffeine around Valentine’s Day. Not to cut back on calories, but to prepare my body for a 48-hour dance marathon! Well, I got super stressed out and turned to baking. Yes, that thing I have a love/hate relationship with. I made a ton of cookies, peanut butter and chocolate rice crispy treats, brownies and another type of cookie. Luckily we had male neighbors in our apartment building…so home-baked treats were easy to pawn off on them!

The other day, I went for something more practical and good for me so I wouldn’t be extra stressed trying to shed pounds from eating a bucket of baked goods! I had written down a recipe a while back that I ran across on a fabulous website (she also does WW recipes!) and so with a big ole chicken breast thawed, I decided to try a new recipe for dinner.

Chipotle Chicken Croquettes (Serves 2 – slightly modified from “Eat Yourself Skinny“)

1 Tbsp. reduced-calorie margarine

2 1/2 Tbsp. minced orange bell pepper

2 1/2 Tbsp. minced green bell pepper

2 1/2 Tbsp. minced onion

1 1/2 cups cooked chicken (I just used 1 big chicken breast I had, about 8-10oz.)

3/4 cup panko breadcrumbs

1/4 cup light mayonnaise

1 egg, lightly beaten

1 Tbsp. Chipotle mustard

1/2 Tbsp. Worcestershire sauce

1/2 tsp. chipotle powder

1/2 tsp. seasoned salt

Spicy Mustard Sauce

1/2 clove minced garlic

1/4 cup light mayonnaise

1/4 fat-free sour cream

1/2 Tbsp. Chipotle mustard

1/2 Tbsp. lime juice

1/2 tsp. chipotle powder

About 1-2 hours before you’re ready to eat, whisk together garlic, mayo, sour cream, mustard, lime juice and chipotle powder until smooth. Refrigerate for 1-2 hours.

Bring a medium pot of water to a boil and add the chicken. Reduce to medium-high and cook 15-20 minutes until chicken is cooked through. While chicken is cooking, go ahead and chop your veggies. Saute them in 1/2 Tbsp. margarine.

In a small bowl, mix together mayonnaise, egg, mustard, Worcestershire, chipotle seasoning and salt.

Once your chicken has cooked and cooled, chop and shred. Add to a medium bowl with bread crumbs and add your sautéed veggies and combine.

Take the small bowl with the mayo/mustard mixture and add to the chicken. Combine with hands until blended and form into 5 patties.

Heat remaining 1/2 Tbsp. margarine in a skillet and cook the patties over medium heat for 3-5 minutes on each side. Serve with a dollop (or more if you desire!) of the spicy mustard sauce and dig in!

Note that this is probably a great appetizer, but I tested it for dinner and 2 1/2 patties was a great portion…