Black Bean and Sweet Potato Burritos

So the husband and I recently cut the cord.

We are a cable-less household. Honestly…it’s a lot better than I thought it would be. The true test will be during football season – I might will not be such a good sport if I don’t get to wake up to College Game Day every Saturday.

Anyways, the first real challenge came a few weeks ago. When the hubby and I first started dating – as in the second time we ever laid eyes on each other – we discovered we both loved the same TV show. 24. So, we rotated “hosting” 24 night by cooking for each other – obviously that’s how I hooked him!

Well for those of you who are fans, you know that 24 has just started back after several years! It was very exciting news. So, on a Monday night (which was also Cinco de Mayo) – knowing that we no longer have a DVR to record such exciting television events, I found myself in a throw back state of mind. I got home late from work, was all ready to throw together our “Meatless Monday” and “Cinco de Mayo” meal while enjoying the return of Jack Bauer. Woops – forgot it started an hour early. Oh how long it had been since I had to cook during commercials – running back and forth when I’d hear “it’s back on!”. Clearly I had gotten spoiled!

Luckily, the meal I planned was super simple. The longest thing is roasting the vegetables, which doesn’t take much time at all – but man it is so delicious. And it’s really filling, which is awesome. Give this a try on your next “Meatless Monday” or any other day of the week!

Black Bean and Sweet Potato Burritos (Serves 4 / 7 WW points per serving)

Ingredients

2 small sweet potatoes, peeled and chopped

1 (15 oz.) can black beans, drained

1/2 small red onion, chopped

2 small jalapeno peppers, diced

1 tsp. olive oil

1 tsp. chili powder

1 Tbsp. taco seasoning

1/4 cup fresh cilantro, roughly chopped

1 cup shredded fat-free cheddar cheese

8 tortillas (I use Ole Extreme Wellness, High-Fiber Low-Carb)

Heat oven to 400.

In a lightly greased roasting pan, add potatoes, black beans, onion, jalapeno, seasonings and cilantro. Toss to mix and roast for 20-25 minutes.

Black Bean and Sweet potato - for roasting

Divide cheese evenly in the center of the tortillas. Spoon veggie filling on top, fold tortillas into the center, then tuck in the ends. Add to a baking dish and bake 10-12 minutes.

Burritos-StepbyStep

Serve with salsa for dipping and enjoy!

Black Bean and Sweet Potato Burritos

Have a happy Memorial Day weekend y’all!


Skinny Eggplant Parm

Today, T.G.I.F. doesn’t seem to be dramatic enough.

I mean, thank freaking ever-loving goodness it is FINALLY Friday.

Whew, much better!

I feel like I am not alone in saying I miss having spring break. For real – there are no words on how much a week off would do my mind/body/soul some good. I guess I’ll just have to settle for planning what to do when I do take my week off! The small victories, right?

This week I’ve needed things to be simple. Easy. I mean, not at all complicated. For instance – I find my “Chicken Gyros” recipe to be fairly simple and oh so delicious. Which it is. Unless you purchase and use VANILLA Greek yogurt instead of plain.

I will say it did give it a very disturbing unique flavor.

So it was time to break out an old friend I haven’t shared with y’all yet! A super light, surprisingly filling, comfort food that’s perfect for Meatless Mondays or just anytime you’re in the mood for it.

SkinnyEggplantParmesan

My super delicious Skinny Eggplant Parm. I love ordering this dish in restaurants – but hate knowing how much unnecessary “bad for you” stuff is in it. So obviously, I had to rectify that situation. Give this one a try – it really does fill you up for such a small amount of points. I served this with some green beans and a toasted roll (okay okay, it was a hamburger bun sprayed with butter and sprinkled with garlic salt – I told you I needed simple!) and dinner was only 9 points. Boom.

Skinny Eggplant Parm (Serves 3 – 5 1/3 WW points per serving)

1 medium eggplant, peeled and sliced into 1/2 inch slices

1/2 cup plain breadcrumbs

2 Tbsp. reduced-fat Parmesan cheese

1/2 Tbsp. Italian seasoning

1/2 tsp. garlic powder

1/2 cup egg beaters

1 1/2 cup tomato sauce

1/2 tsp. salt

1/4 tsp. black pepper

1 tsp. dried basil

1 tsp. dried oregano

1/2 tsp. garlic powder

1/2 cup reduced-fat mozzarella, shredded

Heat your oven to 350. Line a baking sheet with parchment paper for easy clean up – or just spray with nonstick spray.

Set up your assembly station – pour your egg in a shallow dish. In another shallow dish, mix your bread crumbs, Parmesan cheese, Italian seasoning and garlic powder.

Eggplant Parmesan_StepbyStep

Dip eggplant slices in the egg and then dredge in the crumb mixture and add to your parchment paper. Repeat until all slices have been coated.

Bake for 20-25 minutes, flipping halfway through.

While the eggplant is baking, it’s time to “doctor up” your tomato sauce. I prefer doing this because 1 – it’s lower in WW points and 2 – I sometimes find the store-bought sauces to be too sweet. I just mix in oregano, basil, salt and pepper with a few dashes of garlic powder. Season to your own taste – that’s just a good starting point for me!

When the eggplant has finished baking, grease a small casserole dish and pour about 1/3 cup of your tomato sauce to spread in the bottom. Add half of your baked eggplant slices and top with a little bit of shredded mozzarella. Pour remaining sauce over top and stack the remaining eggplant slices on top. Sprinkle with remaining mozzarella and bake about 15 minutes until sauce is bubbling.

Skinny Eggplant Parm - CookingontheBrightSide

Serve and enjoy! Each “slice” is just over 1 point. I had estimated we’d each eat half, for about 8 points – but we ended up being pretty content with just 4 slices for dinner, so I took the remaining 4 for lunch the next day. It was a super delicious and satisfying 5 point lunch!

Hope y’all have a great weekend!

Buffalo Quinoa Cakes

Y’all.

Do you even know what tomorrow is? I mean – other than the last day in August. And Saturday.

It’s pretty much my favorite day of the year. My 2nd Christmas if you will. Today, my friends, is my Christmas Eve.

Tomorrow is the first College Football Saturday of the year. I know there was some action last night (apologies to all of our neighbors last night who were NOT watching the Ole Miss game) – but Thursday night football is kind of like an appetizer. Tomorrow, we feast.

His and Hers

“His & Hers”

Not just in the metaphorical sense either – because clearly, this is a cooking blog so I have some goodies to share with you. Now some football weekends, you give in to the bar food and beer and couch and swear to yourself you’ll work it off the next day.

But what if you could have your “cake” and eat it too?

Thanks to my Biffer’s recent quinoa kick – I remembered a recipe I made a few weeks ago and had not gotten around to sharing with you yet. And what perfect timing, because you know what goes great with college football? My favorite food group – buffalo chicken everything. This one is a little different, but I promise you – it’s delicious and filling and is perfect to serve as a little appetizer, or do what we did and serve it as a main course (with my ranch baked fries, duh).

Buffalo Quinoa Cakes (Makes 9 cakes – 2 WW pts. per cake + 2 pts. for 1/3 cup Ranch)

Ingredients

1/2 cup uncooked quinoa

1 cup water

1 egg, beaten (I used about half)

4 Tbsp. Frank’s Red Hot Sauce

1/4 cup minced yellow onion

2 small stalks celery, minced

1/2 cup fat-free shredded cheddar cheese

1/3 cup reduced-fat blue cheese crumbles

1/4 cup whole wheat bread crumbs (panko or regular)

Salt and pepper to taste

1/2 Tbsp. olive oil

1/3 cup fat-free ranch

Begin by cooking your quinoa according to directions. Add to a medium bowl and let cool for 5-7 minutes.

Add onion, egg, blue cheese, shredded cheddar, celery, bread crumbs, salt and pepper to the quinoa. Mix together using a rubber spatula, then stir in hot sauce.

Using your hands, form about 9 cakes out of the quinoa mixture.

Steps

After you wash off your hands (trust me, you’ll need to) heat olive oil in a medium skillet over medium heat. Add cakes and saute 3-4 minutes per side until lightly browned.

Plated Cakes

Serve with some ranch for dipping, and enjoy!

Buffalo Quinoa Cakes

With that, happy Game Day to all! I’ll be wearing my Blue and White and cheering on Penn State to victory tomorrow afternoon – who are you supporting this weekend?!

Baked Tacos

Let’s be honest – there are few things worse than the first day back at the office after a wonderfully relaxing vacation. I mean, other than the first entire week back. Obvi.

Apologies for my lack of updates – after a fun-filled wedding weekend in Chicago, I was in full on survival-mode with vacation on the brain! The husband and I spent 8 days in South Carolina with my parents, enjoying all that Lake Keowee had to offer! We ate good food, drank good wine, watched movies (it rained a few days), played some tennis, hiked to a beautiful waterfall, soaked up sunshine when we could, read some books, and just had an overall amazing time.

SC WaterfallsLake Keowee South Carolina

Thanks to my parents for putting up with us for a week!

Anyways – aside from that first day catching up on e-mails and curling up in fetal position under your desk when you look at your completed to-do list, the other quite miserable thing  is the kitchen.

Like, why didn’t somebody stock my fridge for my return? Seriously, going to the grocery store can be exhausting when you’ve just spend 8 1/2 hours in a car singing along to the 80’s and 90’s XM stations at the top of your lungs much to the delight dismay of your husband.

Luckily, I had a few items to throw together one of our of new-found favorite meals which was perfect for our “Meatless Monday”. The husband always loves taco night, but this way is so easy because everything is ready at once and the filling doesn’t fall out everywhere!  Honestly, this one is a bit surprising for 2 reasons:

1 – My hubby loves it even when I use the “fake meat”

2 – I love it even though it has re-fried beans, which I usually make the hubby scoop out of the can because they gross me out so much.

So, if anything in this recipe doesn’t sound quite up your ally, just give it a try – I bet you’ll be pleasantly surprised!

Baked Tacos (Serves 2 / 10 pts. per serving)

Ingredients

6 Whole Grain Taco Shells (I use Ortega)

1 1/3 cup MorningStar Farms Meal Starters Veggie Crumbles (or ground turkey/chicken/beef of your choice, will affect WW point values)

1/4 cup chopped yellow onion

2 oz. canned tomato sauce

4 oz. fat-free re-fried beans

4 tsp. Taco seasoning (we use the “Hot and Spicy” mix – yum!)

2 oz. chopped green chiles, canned

1/2 cup reduced-fat shredded cheddar cheese

Toppings of your choice (salsa, lettuce, avocado, olives, sour cream, etc. – adjust point values accordingly!)

Preheat oven to 350. Add taco shells to a lightly greased baking pan so that shells are upright.

Heat a skillet to medium heat and add non-stick spray. Add veggie crumbles and cook 2-3 minutes, then add onions. Cook another 2-3 minutes before adding tomato sauce, chiles, re-fried beans and taco seasoning. Cook another 5 minutes over medium-low heat, stirring to combine and heat through.

Step by Step Tacos

Bake taco shells 2-3 minutes. Remove from oven and distribute the meat(less) mixture evenly in the shells, pressing down to the edges. Distribute the cheese evenly on top of the mixture. Return pan to oven and bake 10-12 minutes until cheese has melted and shells are baked.

Plated

Add toppings of your choice and devour. I usually go with salsa, lettuce, black olives and avocado – but I’m sure anything will be delicious…

Baked Tacos

Hope y’all have a great weekend!

Roasted Vegetable Strudel

So this week, I’ve been determined to get into the Christmas spirit. The 70 degree weather makes it incredibly difficult. I want gloves and scarves and pea coats people! I shouldn’t have to crank the AC down to convince myself it’s cool enough for a hot chocolate, right?

Last weekend, we got our tree. Which is beautiful. It’s also giant – so halfway through putting up lights, we had to run out and buy more. This was after spending the afternoon balancing on a ladder hanging giant ornaments and outdoor lights, so we postponed the actual decorating of the tree until the next night…because I wanted to be able to enjoy decorating, which comes complete with an ornament draft and a viewing of Love Actually.

Ornaments Tree

Now, we’re entering the portion of the month full of holiday parties. I think they are fun on the weekends – but let me tell you, during the week – they can just be exhausting! As in, I get home and don’t want to move. Or cook.

Luckily, I have a great recipe that’s pretty easy to prepare. It’s filling, but not as rich as that cheese ball or creamy dip your co-workers make – and it’s the perfect way to load up on your veggies this holiday season. Don’t be intimidated by the point value – it’s great as a big dinner, or you can divvy it up for snacks!

Roasted Vegetable Strudel (serves 2 / 14 WW points per serving)

Ingredients

1 medium eggplant, chopped

1 medium zucchini, chopped

1 red bell pepper, sliced

1 small red onion, sliced

1/2 package frozen artichoke hearts

1 1/2 tsp. minced garlic

2 tsp. olive oil

“I Can’t Believe It’s Not Butter” spray

10 tsp. reduced-fat Parmesan cheese, grated

1 cup shredded fat-free mozzarella cheese

2 oz. Goat cheese crumbles

10 sheets Phyllo Pastry Sheets

Salt and pepper

2 tsp. Italian herb seasoning

1/2 cup marinara sauce for dipping

Preheat oven to 425. In a deep baking pan, toss vegetables with olive oil, garlic and a few dashes of salt and cracked black pepper. Roast for 25-30 minutes.

Seasoned veggies

While your vegetables are roasting, it’s time to play with Phyllo! Get a sheet of wax paper or aluminum foil and spray with a little non-stick spray (the sheets tend to stick the longer they sit!).

You will need 5 sheets of phyllo for each strudel. Lay your first one down and spray with butter and sprinkle with grated Parmesan. Repeat with each layer. When you get to the final layer, add crumbled goat cheese and shredded mozzarella about 2/3 of the way down the sheet, leaving a 1 inch border on the sides and end.

Phyllo layer Cheeses

When your vegetables are cooked through, add to the top of the cheese. Also reduce oven temperature to 400. (You will probably have some leftover vegetables – they are great for a leftover lunch served with a little crunchy bread!)

Roasted Veggies

Starting from the end with the cheese and vegetables, begin to roll your strudel. This is where you will be glad you used a little non-stick spray! Place strudel seam side down on a lightly greased baking sheet. Spray tops with a little more butter, sprinkle with additional Parmesan and add some Italian herb seasoning. Bake for 15-20 minutes until pastry is lightly browned.

Rolled Baked

Slice and serve with marinara sauce for dipping.

inside

Seriously, why can’t all vegetables look this delicious?

Close Up Bite

Spaghetti Squash Au Gratin

The word of the day is exhaustion!

It’s NBA playoff time and my Memphis Grizzlies are in the middle of a series with the L.A. Clippers. The game Monday night ended up starting at about 7:40 L.A. time…which means it was 9:40 here. Oh, and it went into overtime. Which means yours truly finally went to bed (feeling very depressed after a loss) around 1 a.m.

Coffee was a necessity Tuesday morning. Even more so than usual.

So I’m fading right now (as I write this Tuesday evening) and the sun isn’t even down yet – but have no fear, I have a delicious and diet-friendly recipe to share with you!

Have you ever used spaghetti squash? It’s kind of awesome. You cook it – and it smells awesome. But then you just scrape at it with a fork and it shreds into strands that look like spaghetti.

Soooo I mixed mine with onions, sour cream and cheese and called it a main dish. It was “Meatless Monday” in our house – and man, was it delicious!

Spaghetti Squash Au Gratin (Serves 2-4)

1 medium spaghetti squash

1/3 cup chopped onion

1 Tbsp. margarine

1/2 tsp. dried thyme

1/4 tsp. red pepper flakes

1/2 tsp. minced garlic

1/4 tsp. salt

1/4 tsp. black pepper

1/4 tsp. garlic salt

1/2 cup fat-free sour cream

2/3 cup fat-free shredded cheddar cheese

Heat oven to 375.

Using a very sharp knife, cut spaghetti squash in half. I start on one side, gradually working my way down and around the squash until it comes apart. Scoop out seeds.


Sprinkle black pepper and garlic salt inside the flesh and place in a deep baking pan, flesh side down. Bake 20-25 minutes. Then flip and bake another 20 minutes until tender. Let cool.

While squash is baking, saute onions in margarine with garlic, thyme and red pepper flakes. Cook until tender. Set aside.

Now take your cooled squash and begin scraping the flesh with a fork – it will shred really easily. I got about 3 cups of shredded “spaghetti”. Add to a bowl lined with paper towels to absorb any excess moisture.

Remove paper towels – leaving squash. Add sour cream, onion mixture, 1/3 cup cheese and salt. Mix well.

Pour into a medium to large, lightly greased baking dish.

Top with remaining 1/3 cup cheddar cheese. Bake for 15-20 minutes until cheese has melted.

This would make a great side dish – but like I said, this was our dinner for “Meatless Monday” – so we dug in!

Since we were making a meal of it, I went ahead and added half a petite baguette and a glass of red wine.

Seriously, try it. You won’t be sorry!

Potatoes, Po-Boys and Smokies…Oh My?

So I’m newly married (6 months is coming up quickly!) and I work full-time. The husband is in study mode, so I have a lot of just “me” time – both good and bad! I am loving having a blog as a great creative outlet and something to DO, but recently, it’s been hard to get into a rhythm. It’s been so nice out – so some days I want to come home, sit outside with a glass of wine and read cookbooks instead of, well, actually cooking. Sometimes, the day just takes a toll on me and I’m exhausted by the time I get home!

I guess my point is – yes, there are some days where cooking doesn’t seem like a delight to me – but a chore. I get tired. I get lazy. I get frustrated. And I love to cook!

Usually, these days come after several back to back days of recipes and meals that dirty up lots of dishes. I seriously love all of my new pots, pans and knives – but I hate having to hand wash and dry them all. Why can’t everything be dishwasher safe?!

So this is the point in time when the whole diet thing could come crashing down. But luckily, I have back-up plans for when the thought of planning a three-course meal that uses 4 knives, 3 pots, 2 baking dishes (and a partridge in a pear tree) makes me cringe.

Exhibit A:

Baked Potatoes. It’s so easy to throw scrub a potato and throw it in the oven and find something to do for the hour and 15 minutes or so. Usually my potato includes some butter spray, fat-free cheddar, salt, pepper and barbecue sauce.

But a few weeks ago, I was dying for something spicy! So I decided to make a Buffalo Baked Potato. I added some spray butter, salt and pepper (the base of all my baked potatoes). Then I added some reduced fat blue cheese crumbles, hot sauce, celery, fat-free shredded mozzarella and more hot sauce! It was quite delicious.

Exhibit B:

Another easy thing to throw together that’s also filling is a hoagie of some sort.  Remember when I said I wanted to try to make a shrimp po’ boy with some easy faux fried shrimp? I did and it was delicious! I just sprayed some butter on the bread and sprinkled with garlic salt and baked for a few minutes before topping with shrimp, sauce and some lettuce.

Exhibit C:

Now this last one was just something I had to do. I was in Target last week (anybody else have to go to like, 3 stores to get everything they need? Reduced-fat and non-fat dairy products have me running around like a crazy person) and I noticed a new Jennie-O product. Turkey cocktail sausages/weenies. Or as my family knows and loves them “Smokies.”

I was talking to my Biffer this weekend while she was at the beach (so jealous) and she was up in the condo making lunch. I asked her what she was making and she said “Smokies!” I started salivating. I had to try the “diet” version…even though the husband kind of looked grossed out when I told him what “Smokie Sandwiches” were. Embrace it people, don’t fear it!

Heat your oven to 350.

So you take some smokies (I used 20 total) and cut them in half. Heat up a skillet with a few sprays of olive oil. Add the smokies and cook over medium for 5-7 minutes. Flip and cook another 5-7 minutes until they are all cooked through and have a nice dark color to them.


In the meantime, take 4 slices of rye bread (this was for 2 sandwiches) and lay them on a sheet of foil and place on a baking sheet. Take 2 slices of reduced-fat Swiss cheese and break into pieces, covering one half of each sandwich. Bake for 5-6 minutes until cheese melts. I added a little caraway seed since the bread didn’t have any.

Arrange your smokies on top of the cheese.

Spread spicy mustard on the top half of the sandwich…and maaaybe drizzle a little over the smokies.

Serve with some sauerkraut…I have to have mine on the side because I’m a weirdo. That, and I eat really slowly and hate my bread getting soggy. I know, I know I have issues.

So moral of the story? A meal doesn’t always have to be elaborate or take a ton of ingredients – but you don’t have to sacrifice healthy for quick/easy! Now THAT is Cooking on the Bright Side!


Shaved Asparagus Pizza

So we may have gotten a little out of the habit the past few months, but I’ve started bringing back “Meatless Monday.” Just a little break to appreciate your fruits and veggies!

When we first started doing this, I relied heavily on black bean burgers. That’s not a bad thing – because they are delicious! A few months ago, I decided to make a vegetarian pizza – but I was allll out of pizza sauce. What’s a girl to do?

Um, use cheese. Duh.

I originally used Light Boursin cheese – which is oh so amazing. However, I had purchased  some of the Philadelphia cooking creme (used it in my pierogi recipe) so I decided to test it out. Verdict? You can’t lose. Honestly.

Shaved Asparagus Pizza (serves 2)

Wheat Crust

3/4 white wheat flour

1/2 Tbsp. olive oil

1/2 Tbsp. honey

1/8 tsp. salt

1/2 tsp. yeast

1/4 cup warm water

Mix together flour and salt. In a small bowl, add yeast, honey and olive oil to warm water and mix, then let sit 5-7 minutes. Add liquid to flour and mix until well blended. Cover and let rise 1-2 hours.

Topping

4 oz. shaved asparagus

1/4 cup Philadelphia Italian Herb and Cheese Cooking Creme, reduced fat

1 cup shredded mozzarella cheese, fat-free

Olive oil spray

Black pepper

Garlic salt

Italian herb seasoning

Preheat oven to 375.

Roll out your dough either into one large pizza, or two individual pizzas. (We like our own pizza for some reason!)

Spray each with olive oil and sprinkle with garlic salt and Italian herb seasoning.

Spread about 2 Tbsp. cooking creme on each pizza, just a light layer. This serves as your “sauce” – yes, that is as amazing as it sounds.

Next, add your shaved asparagus. To shave asparagus, you just need a basic veggie peeler. Peel the asparagus until it is in pretty little slivers and curls! You can add a lot more if you want because it cooks down!

Top asparagus with some cracked pepper, and then add mozzarella cheese.

Bake for 15-17 minutes, until crust is crispy and cheese has melted.

Slice and serve. This is such an easy dish to throw together – and I’m sure it would be great cut into multiple slivers and served as an appetizer!


Now try to tell me you even miss meat in this dish…

What the Heck is a Pierog?

Back in May, one of my dear friends and I were in desperate need of a girls night. She had just gotten married and learned she was putting her house on the market (sad face) to move to Atlanta and asked if I would mind come over to her place for dinner and drinks because a workman was coming out to check on a few things. No problem. If there’s food and wine, you know I’m there.

So I get there, we have a glass of wine and she said “Um, I was just planning on throwing together kielbasa and pierogi if that’s okay? I know it’s not fancy, but we really love it.”

I was a little ashamed to admit it – but I think I’d only had pierogi once in my life. It was shortly after attending a Pittsburgh Pirates game with one of my college friends (aka “Punk”) when I so eloquently asked her “What the huh?” and pointed to the odd crescent-shaped costumes racing around the bases as some sort of entertainment – the “Pierogi Race.” She was shocked I asked such a question! “It’s food. It’s amazing food. It’s a Polish dish.”

Well now I felt really silly – and yet, I was 18 years old and grew up in Memphis, TN. Not my fault I’d never seen “Pierogi” listed as a side dish to go with your slab of ribs!

I learned that pierogi are basically pasta pockets that are filled with a mashed potato type filling that can also include cheese and/or onion. Oh, and they are delicious.

So back to my friends dinner – kielbasa and pierogi. Of course it sounded delicious.  A – I knew all of those ingredients and liked all of them. B – I was intrigued to see how this would play out. mainly because I forgot pierogi existed in the aisles of my neighborhood grocery store.

The verdict? Oh my goodness it was so good. Easy and absolutely delicious. I am fairly certain I went to the store a day later and bought everything to make it and very excitedly told the husband we were having pierogi. He looked very confused…”Gesundheit?”

Now he requests it, which I’m totally fine with because it’s super simple! I even figured out how to “lighten it up” for the good ol’ diet! It’s really handy for the nights when we have a function or meeting to attend and get home a little later – because it’s so easy to throw together!

Well, I (of course) decided to make it difficult. I mean, more difficult than boiling water and adding the frozen pierogi.

Yes, I decided to make homemade Pierogi! This definitely not something that you can throw together with an hour or two before company arrives – but it was a lot of fun and totally worth it when I dove into that first bite. I plan on experimenting with the filling quite a bit in the future!

Asparagus, Cheese and Herb Pierogi (serves 2-4)

For the Dough

1 1/2 cups white whole wheat flour

1/2 tsp. salt

2 Tbsp. fat-free sour cream

1 egg

1/4 cup warm water

Add all ingredients to a mixer fitted with a dough hook. Mix until dough forms into a ball, scraping up any stray bits of flour to incorporate into the mixture. Cover and let rest 30 minutes. (P.S. I finally got to break out my beautiful red Kitchen Aid mixer!! The little things in life I tell ya…)

For the Filling

4 oz. trimmed asparagus

Olive oil spray

1 medium potato

1/3 cup Philadelphia Italian Cheese & Herb Cooking Cream (Reduced Fat)

1/2 tsp. salt

1/2 tsp. black pepper

First, you need to roast your asparagus. Heat oven to 400, spray trimmed asparagus with olive oil and sprinkle with a little salt and pepper. Roast for 15-18 minutes and remove to cool. Chop roughly and set aside.

In the meantime, you’ll need to boil your potato. Peel and cube the potato and add to boiling water. Cook for about 10-12 minutes until tender. Drain and set aside.

Add chopped asparagus, potato and cooking creme to a food processor. Sprinkle with 1/2 tsp. each salt and pepper. Pulse food processor until ingredients are well blended and relatively smooth.

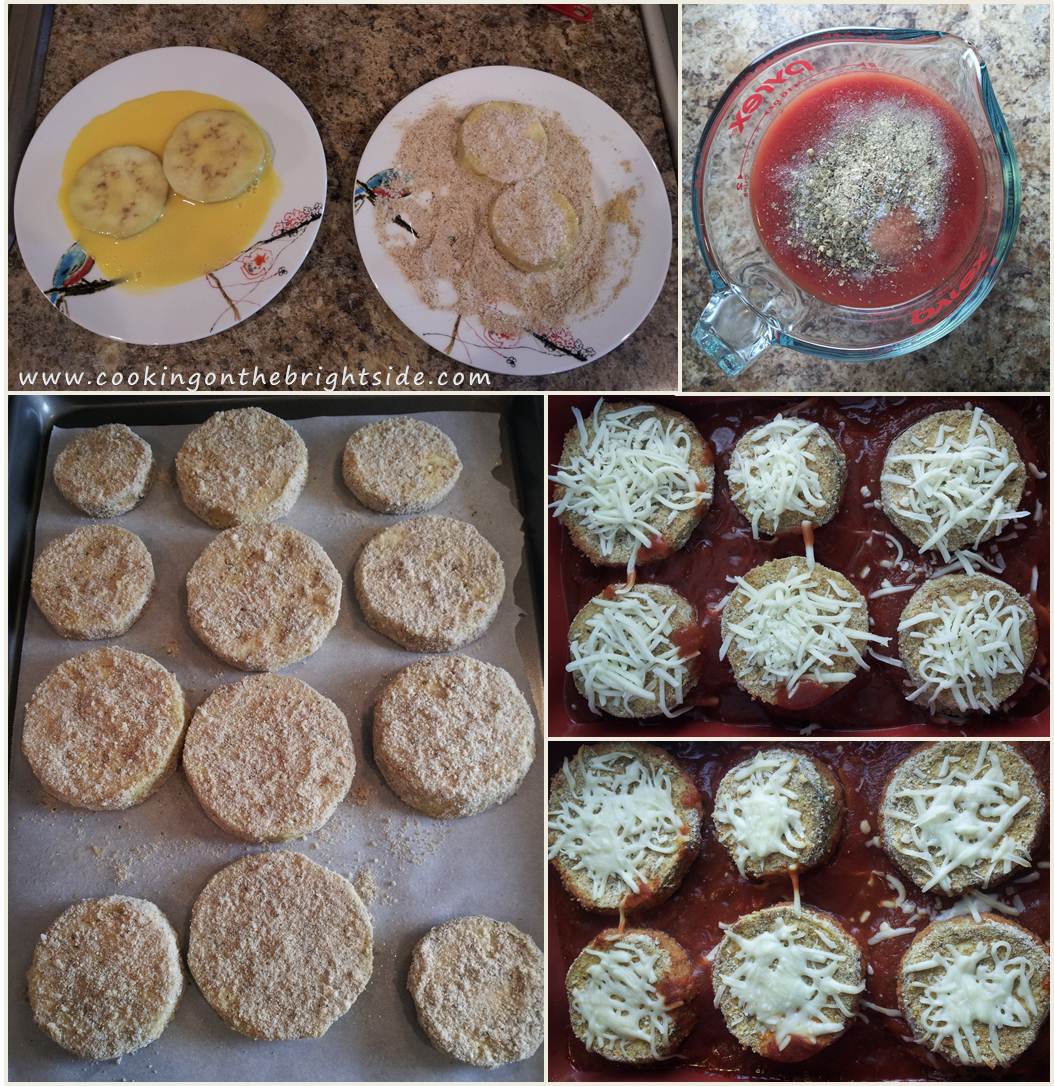
Remove dough and roll out to about 1/8 inch thick. I used a glass that was about 3” diameter to cut my pierogi…you can do the same!

Spoon about 1/2 or 1 Tbsp. of the filling in to the center of each circle. Bring edges together to form a crescent shape and pinch together, ensuring you have a good seal.

Repeat until all pierogi are formed.

Bring a medium pot of water to a boil and add a pinch of salt. Add pierogi to the boiling water about 5-6 at a time. Boil 4-5 minutes, or until they float to the top, and remove with a slotted spoon. Repeat until all are done.

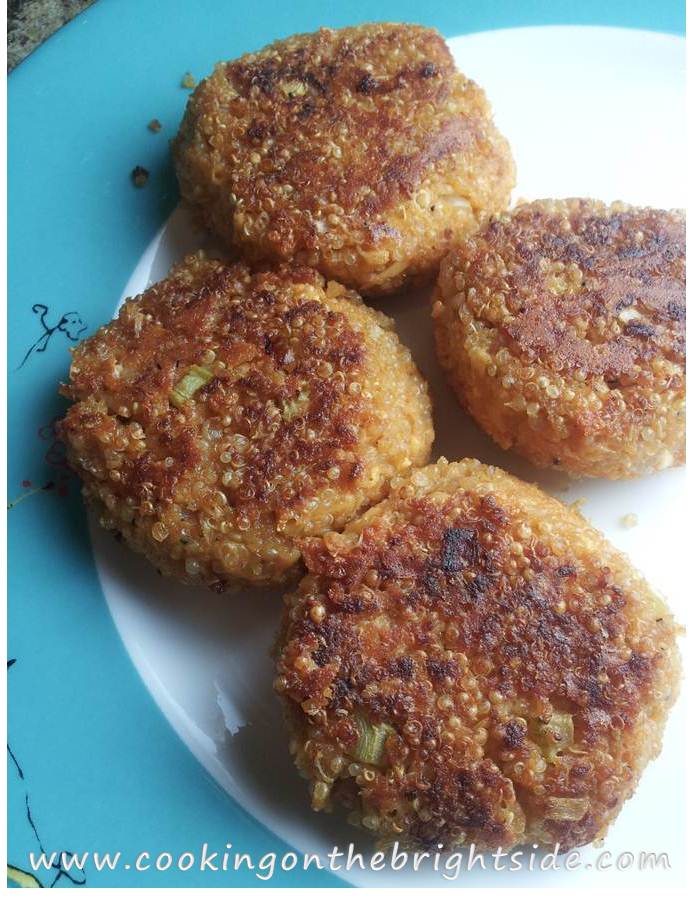
Plate your pierogi and garnish with whatever you want! We usually do a little salt, pepper, butter spray and some shredded cheese (mozzarella here).

Oh, I am proud to inform you that while writing this post I learned something new – as I used to refer to the dish as “Pierogies”. “Pierogi” is actually the plural and “Pierog” is the singular form. Like you could just have one of these?

Hope everybody had a great weekend!